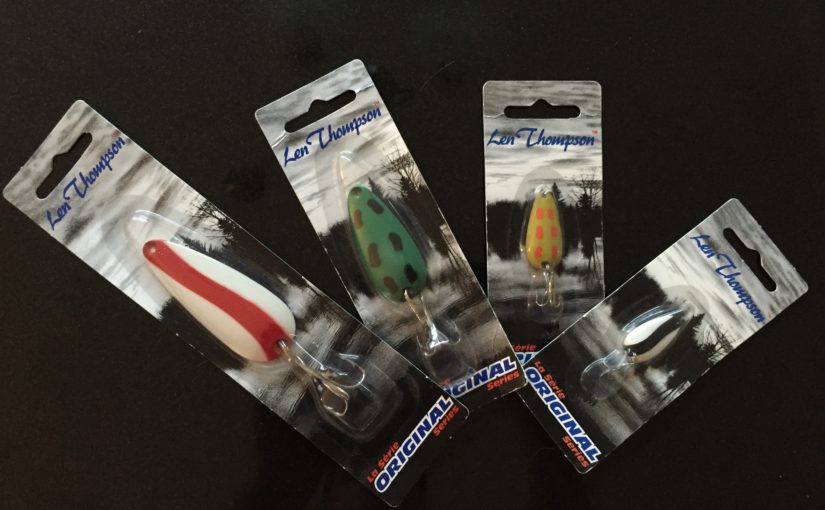
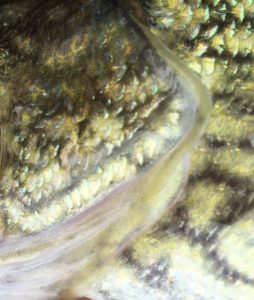
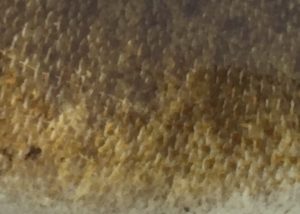
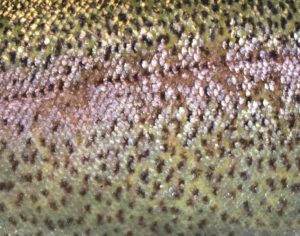
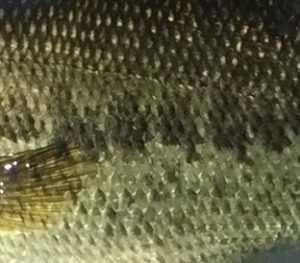
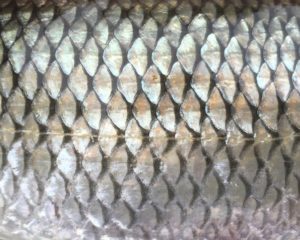
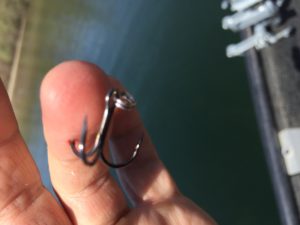
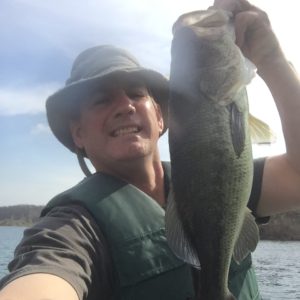
The colors and scale patterns on “everyday” fish never cease to amaze me. Here are five close-ups of common freshwater fish and a chance to win a prize. Submit your guesses through the contact button on the left. The first person with an all correct submission, or the most correct by Monday, May 30th will win your pick of a Len Thompson spoon shown above.
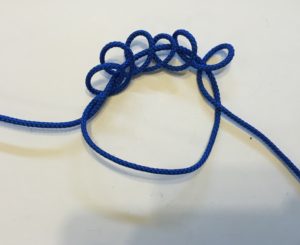
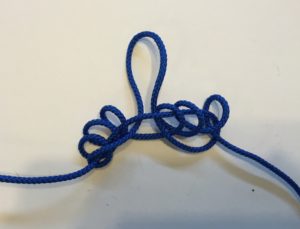
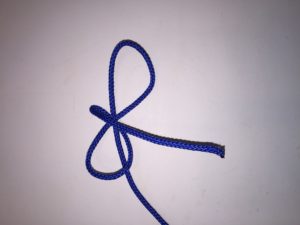
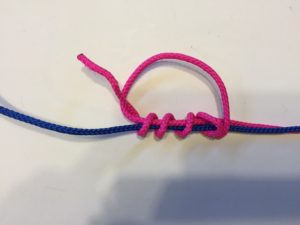
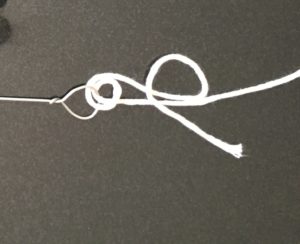
Form a loop in the line.Pass the tag end of the line through the loop about 6 times.Pull the bottom of the original loop up through the middle of the six coils that you just formed.
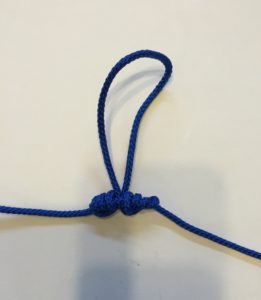
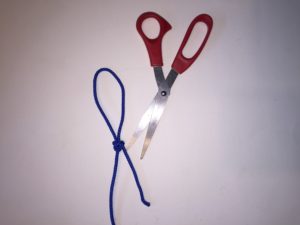
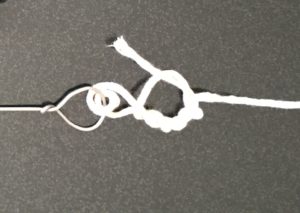
Moisten the knot and draw it tight from the main line, tag end, and the loop at the same time. It should be fairly even size and neatly stacked on each side of the loop.
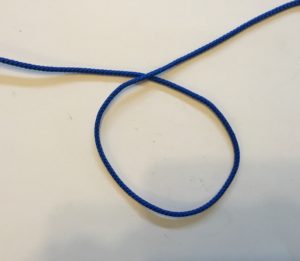
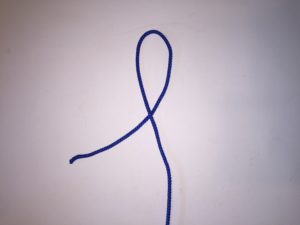
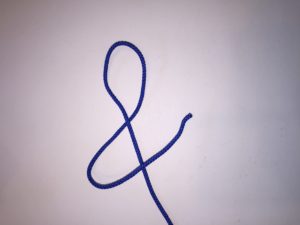
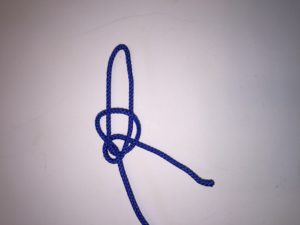
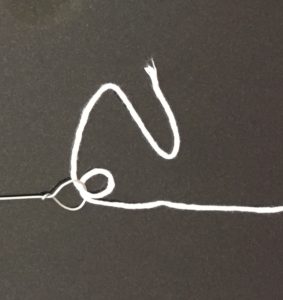
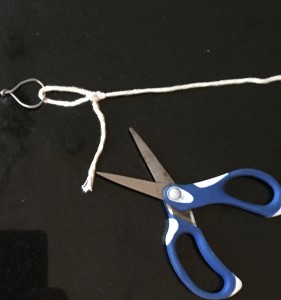
Form a loop with the tag end going under the main line.Turn the tag end back in the reverse direction over the main line.Bring the tag end under the “figure 8”.Fold the tag end back over the “figure 8”.Pull the loop on the main line side over the tag end and through the other loop.Moisten the knot, draw it tight, and trim the tag end.
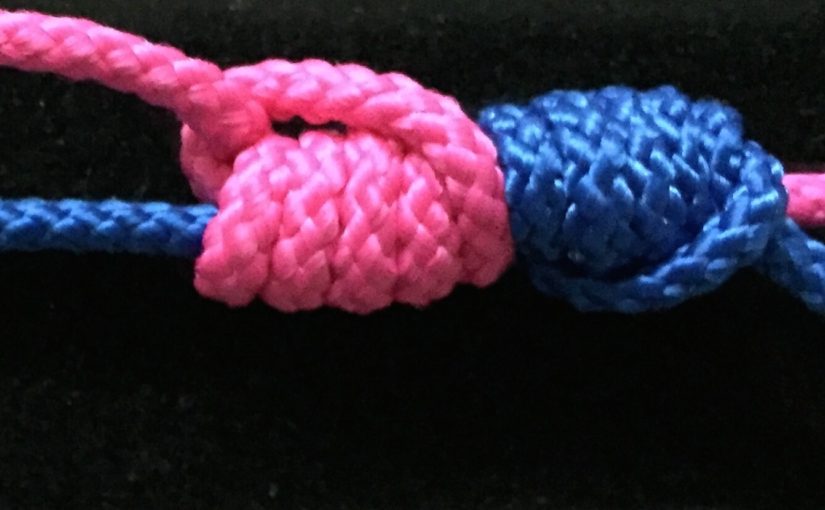
The Uni to Uni is my go-to knot for connecting my main line to a leader. It is a very reliable knot for attaching mono or fluorocarbon to superlines. I routinely use it with 14 to 30 pound braid and 12 to 30 pound fluoro/mono and also 6 to 10 pound Fireline and 8 to 15 pound fluoro. The Uni to Uni Knot is quick, easy, and strong. What else could you ask for?
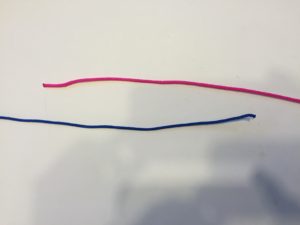
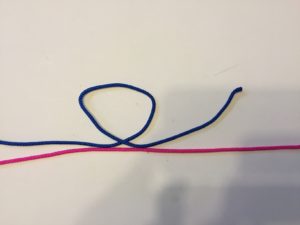
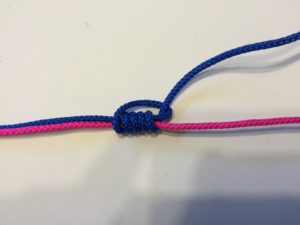
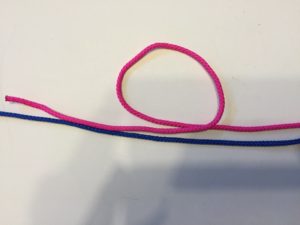
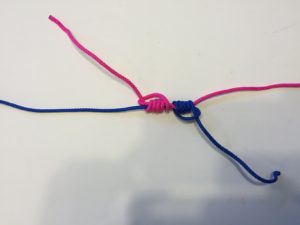
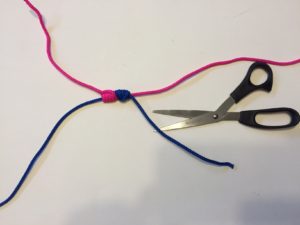
Lay about a foot or so of line and leader along side each other.It doesn’t matter which piece you start with, but I usually start with the main line. Form a loop in the main line keeping in along side the leader.Take the tag end of the main line and go through the loop and around the leader 4-6 times. The thinner the line, the more wraps.Holding the main line and its tag end, moisten the knot and pull it just to the point where you start to feel some resistance.Repeat the process with the leader on the main line. Form a loop of leader along the main line.Pass the tag end of the leader trough the loop and around the main line 4-6 times.Moisten and “snug up” the leader knot. Then moisten the line and leader between your two knots and slide them together.Using all four legs, tighten the two knots and pull the line and leader so they jamb together. Trim the two tag ends closely.
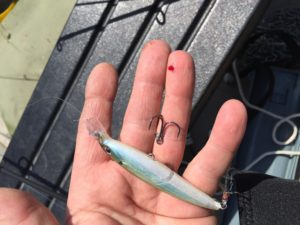
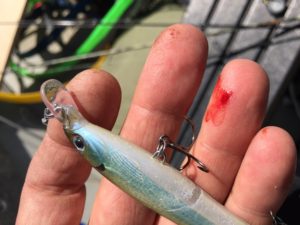
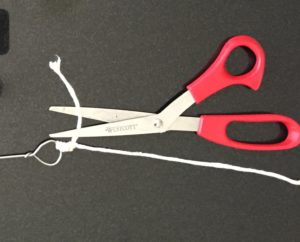
I’ve used this method multiple times to remove hooks in past the barb. A few times the hook was pulled from me, a couple times by me, and once, last week, both. It’s worked equally well with hooks ranging from trout flys to musky lures. I am not advising anyone to forego medical treatment, but my experience says this system works. That said, if I catch a hook in the eyelid; I’m finding a doctor.
1. Separate the hook from the fish and then the hook from the lure.
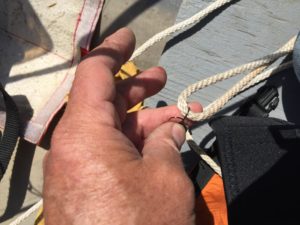
2. Loop a piece of strong cordage through the bend of the hook. A piece of lightweight rope, a strong shoelace, or even a heavy duty bite leader could work.
3. Press down the eye of the hook firmly against your skin, while keeping the hook lined up in its original path. Pressing the eye of the hook is very important. This puts the force of the pull on the outside of the hook bend, away from the barb.
4. Now, pull the hook out with a hard straight “yank’ following the reverse path that put the hook in. It will hurt less than you’d think.
5. Find the hook. Sometimes it stays on the cord; usually it will fly off.
The Uni Knot is quick and easy to tie and very effective with mono or fluorocarbon lines and leaders. One simple modification makes this knot even more versatile. Passing the line through the eye twice at the beginning of the process makes it equally effective with braided or fused super-lines, giving you a reliable knot for all types of line.
Pass the line through the hook or lure eye. For braided or fused super-lines, pass the line through twice, as shown in this pic.Lay the tag end and the main line parallel and loop the tag end back as if getting ready to tie an overhand knot.Pass the tag end through the loop and around the main line four to six times.Moisten the line and carefully draw it all tight to the eye. Trim the tag end.
A vertical lure presentation is obvious when fishing from a boat, but it is often overlooked by the shore-bound fisherman. We cast out and retrieve at one depth, whether that be near the surface or along the bottom or at one given depth inbetween. Most lures are designed to be most effective on the retrieve. Spoons, on the other hand, are equally effective on the drop as on the retrieve. By using a start and stop retrieve you can cover the entire water column. This is a technique that works great when walking the banks of steep sided lakes and ponds for suspended trout.
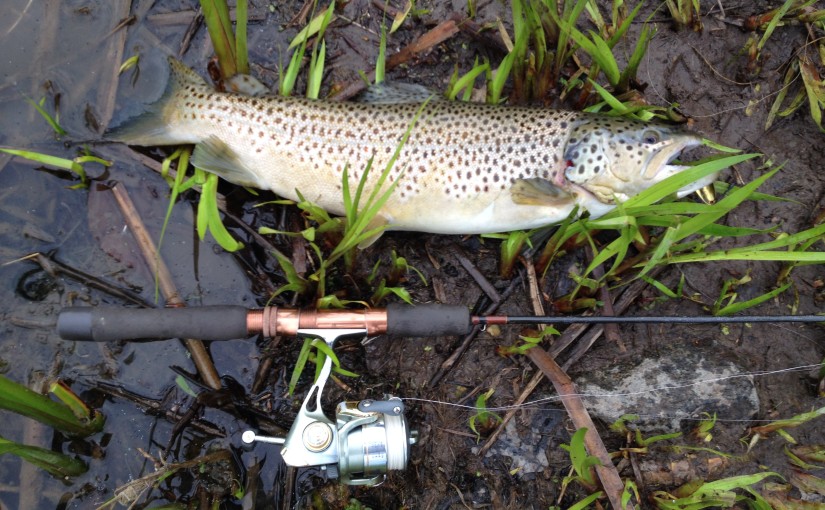
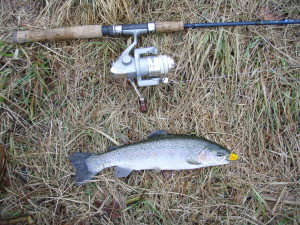
My spoon of choice for this technique is the Len Thompson. This rainbow’s day was interupted by a Len No. 7..
It will take a few casts to find the proper pattern of starts and stops. Begin with a cast to deep water. Take up most of the slack line. Count at a steady pace and watch the line. when the lure hits bottom take note and begin your retrieve. I generally reel this first cast straight in. It is likely that your spoon picked up some weed or algae. The next cast is when we start fishing. Repeat the process, but start your retrieve one or two counts less than it took to reach bottom on the first cast. For example; if it hit bottom at 10 on the previous cast, start reeling at 8 or 9 this time. Now, this cast I will again reel straight in, but with confidence that it is clean. Your lure will cut a diagonal path from the lake bottom to surface at the shoreline, and hopefully encounter trout along the way.
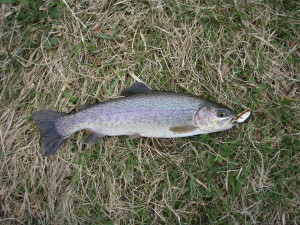
This nice stocked rainbow was one of many on a day when “the drop” was key.
Next, try some mid retrieve drops. About halfway in, let it drop while counting. Note when you hit bottom. Subtract one or two and use this as your mid-retrieve drop count. Now, your retrieve will start with a vertical flutter toward the bottom, swim diagonally up toward the surface, flutter downward again, and finally swim to the surface again. With this sytem you can cover the entire water column with a zig zag pattern. Make a mental note of when and where the trout take the spoon and try to maximize the spoon’s time in that part of the retrieve. Maybe they are mostly hitting on the drop, so you add more drops. Maybe they are deep and far and you only need that first drop to connect with fish. Experiment with retrieves.
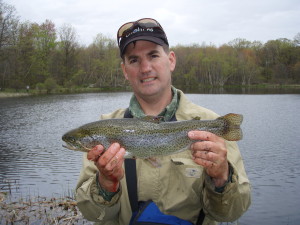
Experiment with color too. On this day, the classic 5-O-Diamnonds was irresistible.
One last important tip: watch your line like a hawk. If you see any movement of the line on your drops, take up the slack and be ready to set the hook. Often the bite is visual. You may never feel them take. Put this retrieve and some spoons in your arsenal for trout or any gamefish in steep sided waters. It will payoff when other presentations do not.
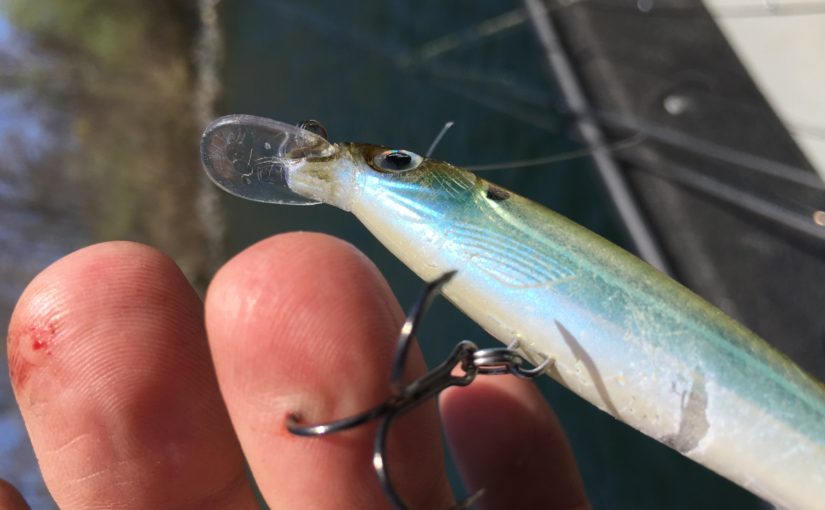
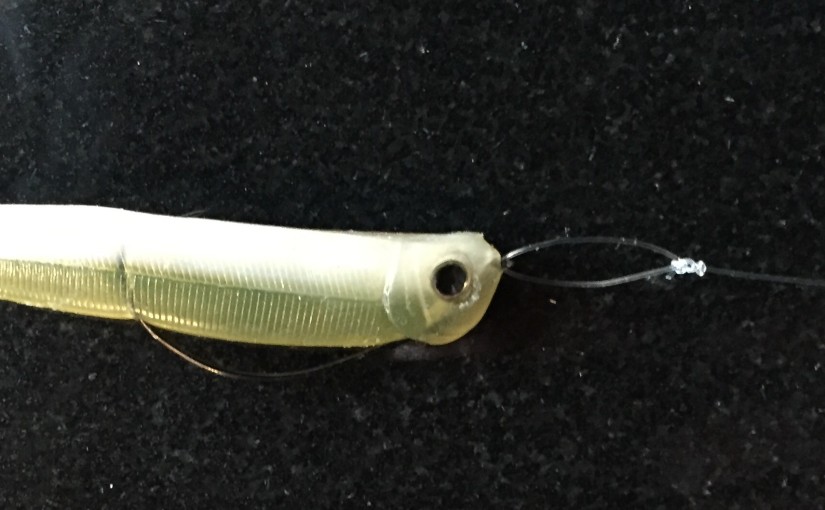
A loop knot is a very useful connection for baits with subtle actions. Jigs, soft jerkbaits, and ultralight crankbaits are excellent examples of where a loop knot will aid your presentation. The thicker the line, the more valuable a loop knot connection becomes. The image above shows a Hawg Shad rigged with a 30# fluorocarbon bite leader attached with Don’s Knot.
This is an easy and strong loop knot that I use almost exclusively for my loop knot needs. It’s so reliable that I often find myself tying it when a loop is not even necessary for the presentation. A gentleman named Don showed me this knot several years back. If I remembered his full name, I’d properly credit him. I don’t, so I’ll just pass this along as Don’s Knot – which is what I have come to call it.
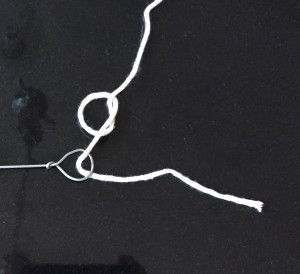
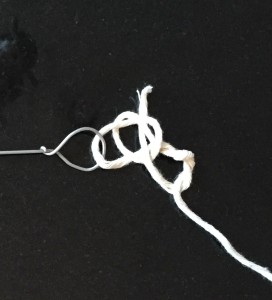
1. Tie an overhand knot a few inches up the line. Do not pull it tight.
2. Thread the line through the hook eye.
3. Wrap the tag end around the main line three times above the overhand knot.
4. Run the tag end through space near the hook eye and also through the overhand knot.
5. Moisten the knot and pull tight. Trim the tag end closely.
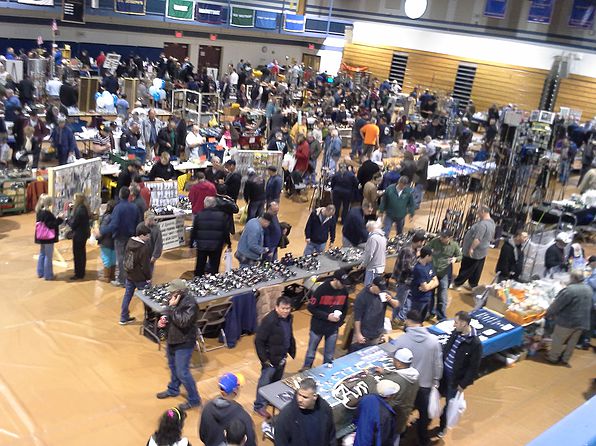
Whether you are stocking up on tackle for the season, seeking vintage collectibles, or just looking for bargains; fishing flea markets offer one stop shopping for all fishermen. As we ease into spring, we ease out of the fishing flea market season. These are two good shows that close out the season here in the Mid-Atlantic region.
April 3rd: St. Joseph’s College, John A. Danzi Athletic Center, 155 West Roe Blvd., Patchogue, NY
April 10: Cape May Elementary School, 921 Laffayette St, Cape May, NJ
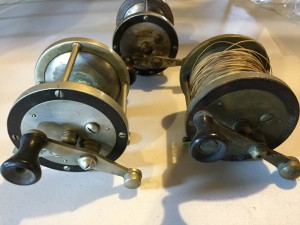
Vintage tackle of all kinds is available at most fishing flea markets.Fishing flea markets are the place to go to find tackle from small manufactures that the big name outlets don’t carry.
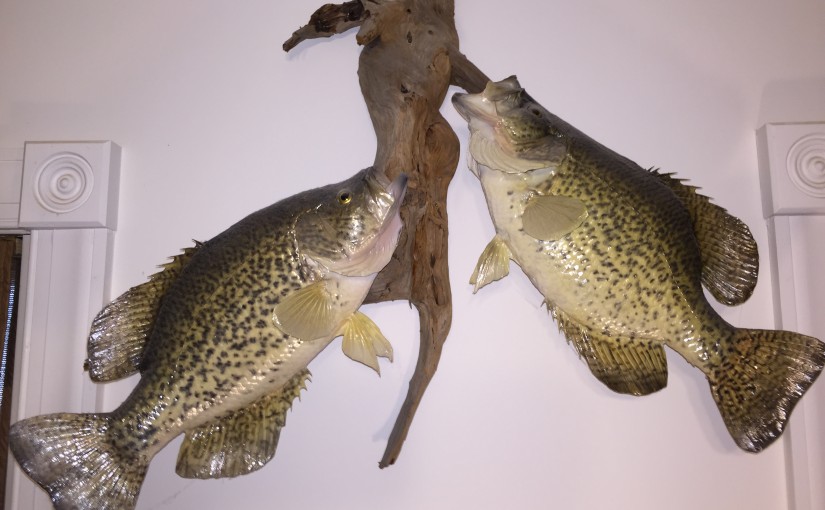
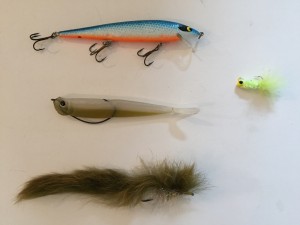
Over the years, I have noticed the majority of the crappies I’ve caught exceeding two pounds have fallen for just a handful of lures. In no particular order, these are my top producers of large crappies. They are not lures that will fill a cooler every day, but they are lures that will fill your memories with images of monster crappies.
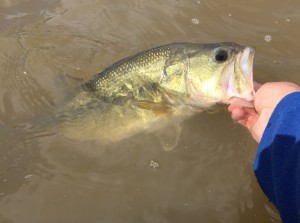
1. Thin minnow plugs – Rapalas, Rogues, Rebels, etc. We are talking bass size now – not the size that you would usually consider panfish bait. Select models in the 4 1/2 to 5 inch range. Vary your retrieves. Sometimes slow and steady is all it takes. Other times a twitching retrieve gets more strikes. This kind of bait can also be trolled with great success.
Not a monster, but a nice fish, and just average size for the Rogue.
2. Soft jerkbaits – Hawg Shads, Bass Assassins, even stick worms can fit in this category. Texas rig them without weight. Use a slow, stop and go twitch retrieve to appeal to a crappie’s fondness for weak and dying minnows. The dart and glide action of a weightless soft plastic mimics this perfectly. And again, we are talking about bass size baits around the 5 inch mark.
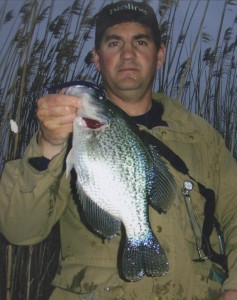
Using “bass” plastics like Hawg Shads while fishing prime crappie waters can yield great benefits.
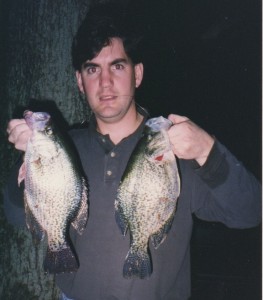
4. Bunny Leech pike fly – This is the one that started the wheels turning. Many years ago while pursuing pike and bass with the long rod, quality crappies started appearing among my catches. The undulating rabbit strip, and stop and go action are irresistable to big crappies. Now, I’m not suggesting you take up flyfishing just to use this lure/fly. I am suggesting that if you are already a flyrodder, try a 5 to 6 inch rabbit strip leech on your favorite crappie lake. You will be pleased with the results.
This throwback pic shows pair of 2 1/2# black crappies. These were the first “big” crappies I’d ever caught. Their downfall? A 6″ rabbit strip fly cast for pike.
What do all of these lures have in common? Size and shape is the most obvious. Consider lures with a 4 1/2 to 5 1/2 inch length along with a narrow profile. Although they dwarf typical crappie lures, we are not looking for typical crappies. We are targeting the biggest in the lake.
The BIG three and a marabou crappie jig shown for scale.Plenty of bass will also fall for the presentation, but they don’t have to know you are crappie fishing.